

Is it just me or are the holidays flying by this year? We just got past St Patrick's Day and Easter is quickly approaching.
This weekend we took our annual picture with the Easter Bunny and the pictures came out adorable. You can find them on my Instagram!
On Sunday, Hailey was a bit under the weather and took an extra long nap, so Tyler and I had more one on one time than usual. We definitely took advantage by making bracelets, playing with the parachute men outside, and making our Easter craft. It was lots of fun!
Here's how we made our super cute Easter Chick which will definitely be making appearances in our Easter decor year after year.

What You Need
Yellow Tissue paper
Yellow, orange and white construction paper
Glue
Black Marker
Cereal Box
Wrapping Paper
Tape
Orange Pipe Cleaners
Scissors
What To Do

1. First we took an empty cereal box and cut out one of the big sides. This is the backing for our chick so it can stay stiff and sturdy.
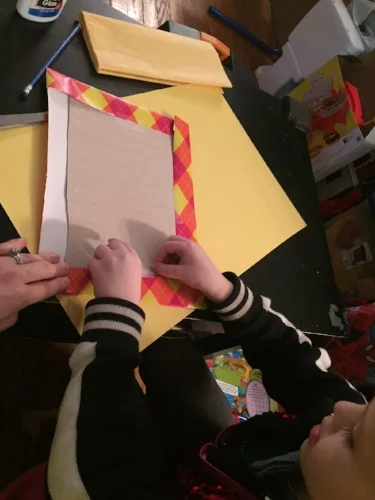
2. Next, we covered one side of the cereal box cardboard with spring time wrapping paper. This is so that we wouldn't have Captain Crunch as the background for our chick.
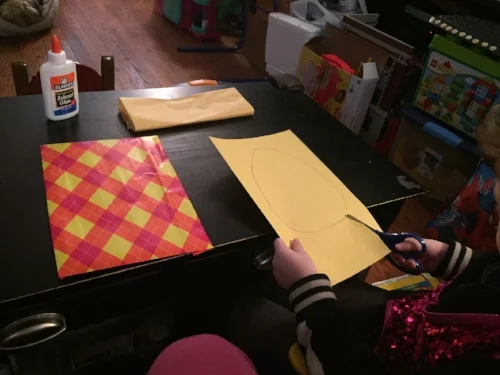
3. Next we took a piece of yellow construction paper and cut out a large egg shape. I drew it and T cut it out. You want it big enough to take up about 75% of your cardboard box. While Tyler was cutting out the egg shape, I cut a sheet of tissue paper into small approximately 1 inch squares.
4. We glued our yellow egg onto the gift wrapped cardboard towards the top. This will be the body of our chick. This will ensure that you won't see any gaps between the tissue paper.
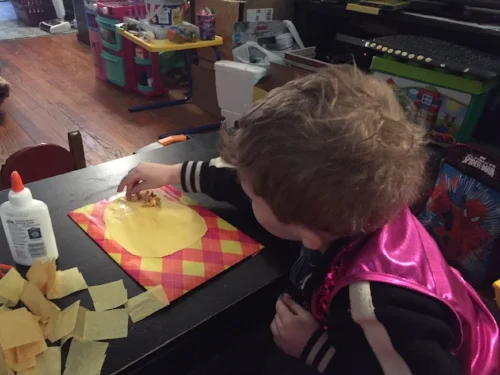
5. Tyler took the tissue paper squares, crumpled them up and glued them onto the yellow egg shape. He worked in sections so the glue wouldn't dry up.

6. Once the entire yellow egg was covered, T cut off the corner of a piece of orange construction paper to form the beak of our chick. We glued this onto our chick.
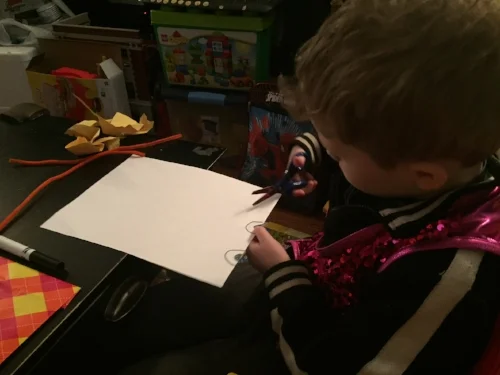
7. We then drew two eyes onto our white construction paper, Tyler cut them out and glued them onto the chick as well.
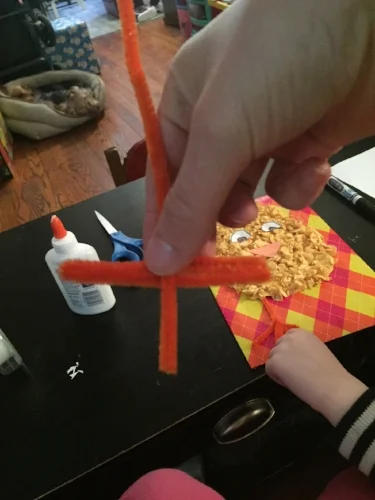
8. Finally, we took two orange pipe cleaners and cut them in half. I took one of the halves and folded it in half. I twisted this around one of the other halves to form the chick's feet. I tucked the top of the pipe cleaner leg under the chick body and secured it with glue. Repeat the same process for the other leg.
In hindsight, you could probably use one pipe cleaner and cut it in 4 pieces and have far less excess to fold in half and tuck behind the chick.
Anyway, here is our finished product! I think it came out really cute and Tyler was super proud of it.

Do you get crafty at Easter time? What is your favorite Easter craft? Let me know in the comments.
Cheers,
Emily


